Beginner's Guide to Self-Hosting using Docker, WireGuard and DuckDNS

Self-Hosting is becoming increasingly popular these days. It is essentially the practice of locally hosting and managing services, putting you in full control of your data. A few years back, I wrote a guide on self-hosting Nextcloud and exposing it to the internet using a simple SSH tunnel. This is an updated version of the same guide, using a WireGuard tunnel instead of SSH. We will be hosting Nextcloud again - a popular, free, open-source and self-hosted alternative to Google Drive with many more features and add-ons.
Prerequisites
- A local linux machine - can be your PC, laptop, VM, Raspberry Pi, NUC, or even a dedicated home server. In this guide we use an Ubuntu 22.04 LTS virtual machine.
- Basic understanding of Linux, Containers and Networking.
- Oracle Cloud free tier account for the remote VM which acts as your tunnel and reverse proxy to publish your apps to internet.
It is recommended to use a paid compute resource such as AWS EC2, Azure VM, Digital Ocean droplet etc. Oracle might terminate your free resources and suspend your account if they suspect you have violated their TOS.
Components
- DuckDNS - For obtaining a free sub-domain.
- Docker - Container platform for Nextcloud and Caddy (reverse proxy).
- WireGuard - For setting up a secure tunnel and expose Nextcloud to the internet.
- Oracle Cloud Compute - Virtual machine for hosting the remote tunnel/reverse proxy server.
Set up free sub-domain name with DuckDNS
Let’s start by creating a free sub-domain name from DuckDNS.
- Create an account on DuckDNS and note down your token.
- Choose your an available sub-domain name. For eg. myhosted.duckdns.org
- Leave the IP as default for now, we will update it later.
Setup your local Nextcloud instance
- On your local server, install Docker. Official documentation.
1
2
3
4
5
6
7
8
9
10

# Download the convenience script
curl -fsSL https://get.docker.com -o install-docker.sh
# Verify the script's content
cat install-docker.sh
# Run the script either as root, or using sudo
sudo sh install-docker.sh
# Add current user to docker group to manage Docker as non-root user
sudo groupadd docker
sudo usermod -aG docker $USER
newgrp docker
- Create a directory for your Nextcloud configuration and compose files.
1
2
3
4

sudo mkdir /opt/nextcloud
# Make current user the owner of the directory
sudo chown $USER: /opt/nextcloud
cd /opt/nextcloud
- Create your Nextcloud compose file
compose.yamlin the directory you just created and add the below content. Make sure you update the passwords andNEXTCLOUD_TRUSTED_DOMAINS.1 2 3 4 5 6 7 8 9 10 11 12 13 14 15 16 17 18 19 20 21 22 23 24 25 26 27 28 29 30 31 32 33 34 35 36 37 38 39
services: db: container_name: mariadb image: mariadb restart: always command: "--transaction-isolation=READ-COMMITTED --binlog-format=ROW --innodb-file-per-table=1 --skip-innodb-read-only-compressed" volumes: - ./db:/var/lib/mysql environment: - MYSQL_ROOT_PASSWORD=securerootpassword - MYSQL_PASSWORD=securepassword - MYSQL_DATABASE=nextcloud - MYSQL_USER=nextcloud redis: container_name: redis image: redis restart: always app: container_name: nextcloud image: nextcloud restart: always ports: - 8080:80 links: - db volumes: - ./nextcloud:/var/www/html environment: - MYSQL_PASSWORD=securepassword - MYSQL_DATABASE=nextcloud - MYSQL_USER=nextcloud - MYSQL_HOST=db - REDIS_HOST=redis - NEXTCLOUD_TRUSTED_DOMAINS=""localhost *.myhosted.duckdns.org"" # Two double quotes required due to a bug in the nextcloud docker image - NEXTCLOUD_ADMIN_USER=admin - NEXTCLOUD_ADMIN_PASSWORD=securenextcloudpassword depends_on: - db - redis
- Spin up Nextcloud containers.
1
2
3
4

# Run the below command from the directory which contains the compose.yaml file
docker compose up -d
# To view the container logs
docker compose logs --follow
- If the installation is successfull, you should be able to browse your Nextcloud instance at
http://<ip of local server>:8080. Username isNEXTCLOUD_ADMIN_USERand password isNEXTCLOUD_ADMIN_PASSWORDfrom your compose file.
Let us now expose the newly created Nextcloud instance to the internet.
Setup the WireGuard VPN Server
WireGuard is a modern VPN protocol which is known for its security, high performance, ease of use and simplicity. In this guide, we will self-host a WireGuard tunnel to connect your local network services from anywhere in the world. We can use this as a safe alternative to port-forwarding directly on your router, Cloudflare tunnels or SSH tunnels since it:
- Runs at the Linux kernel to offer extremely high-speed networking.
- Offers high security using state-of-the-art cryptographic techniques, including Noise protocol framework, Curve25519, ChaCha20, Poly1305, BLAKE2, SipHash24, HKDF, and secure trusted constructions.
- Bypasses firewalls and restrictions set by ISPs like CGNAT.
- Allows pre or post scripts to configure the tunnels according to your needs.
We can use WireGuard to create a secure tunnel to expose your services to external network. It is a good idea to host the tunnel server on a remote machine, preferably a cloud instance like AWS EC2, Azure VM, OCI Compute, Digital Ocean Droplets or any other similar service of your choice. This machine will act as your front-end and proxies incoming requests hiding the real back-end server. Let us create an always-free Oracle Cloud Compute VM and install WireGuard on it.
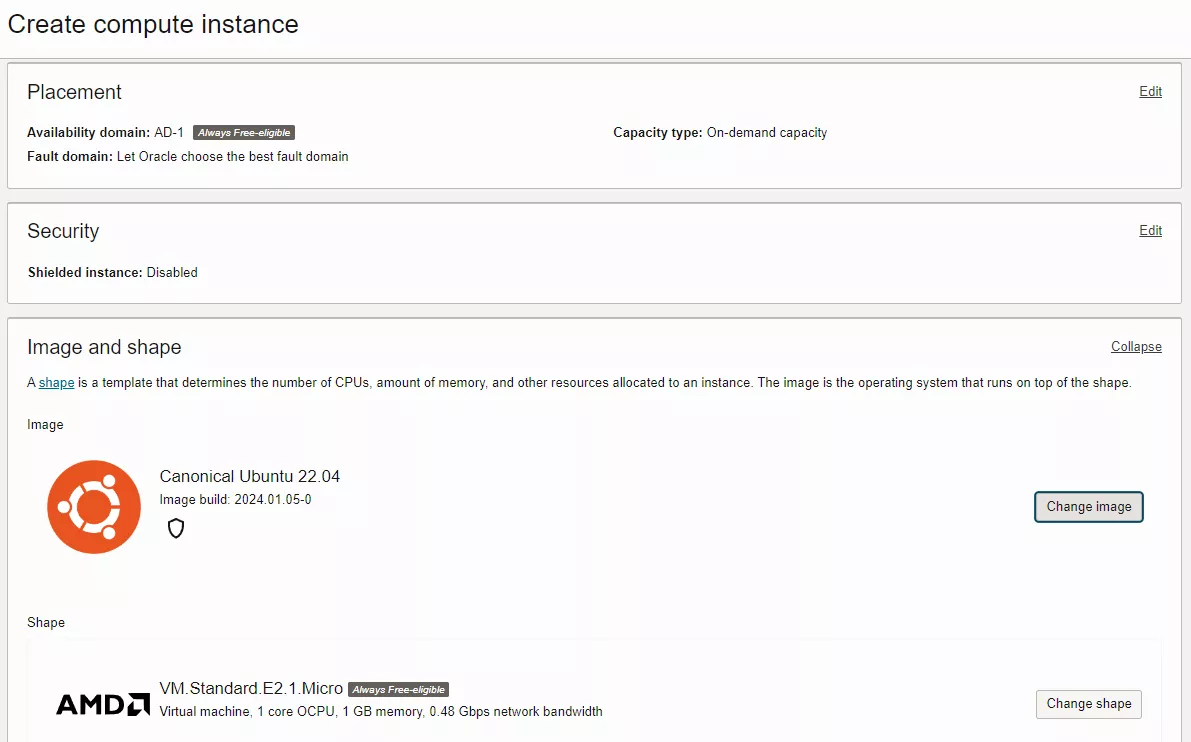
- Login to your Oracle Cloud Account and create an Always Free eligible compute instance. Menu → Compute → Create instance
- Provide the instance name, for VM image select Canonical Ubuntu 22.04.
- Scroll down the page and download your SSH private key. Leave the rest of the settings as default and click on create. Wait for the instance to come up and note down the public IP of the machine.
- On your Oracle Cloud console, go to Menu → Networking → Virtual Cloud Networks → Open the default VCN → Under Resources select Security Lists → Open the default Security List → Add a new ingress rule as below for the WireGuard (51820), HTTP (80) and HTTPS (443) traffic. SSH Port should already be open by default.

- Login to your DuckDNS account and update your domain name with the public IP of your remote server.
- From your local machine try logging into the remote server using the private key you downloaded earlier.
1
2

chmod 400 your_ssh_private.key
ssh -i your_ssh_private.key ubuntu@<public IP of your remote server>
- On the remote server, install Wireguard and create the keys.
1
2
3
4
5
6
7
8
9

# Install Wireguard
sudo apt update
sudo apt install wireguard resolvconf -y
# Create private and public keys
sudo wg genkey | tee /etc/wireguard/server_private_key | sudo wg pubkey > /etc/wireguard/server_public_key
sudo wg genkey | tee /etc/wireguard/client_private_key | sudo wg pubkey > /etc/wireguard/client_public_key
# Remove unnecessary permissions from the keys
sudo chmod go= /etc/wireguard/server_private_key
sudo chmod go= /etc/wireguard/client_private_key
- Create the Wireguard server configuration file (copy and paste all the below lines together). Make sure you update
ens3in PostUp and PostDown section with your default network interface. You can check yours using the commandroute.1 2 3 4 5 6 7 8 9 10 11 12 13 14 15 16 17 18 19 20 21 22 23 24 25 26 27 28 29 30 31 32 33 34 35
sudo cat > /etc/wireguard/wg0.conf <<EOF # Server configuration [Interface] PrivateKey = $(cat /etc/wireguard/server_private_key) Address = 10.0.0.1/24 # PostUP - Commands to run after starting WireGuard PostUp = iptables -t nat -I POSTROUTING 1 -s 10.0.0.0/24 -o ens3 -j MASQUERADE PostUp = iptables -I INPUT 1 -i wg0 -j ACCEPT PostUp = iptables -I FORWARD 1 -i ens3 -o wg0 -j ACCEPT PostUp = iptables -I FORWARD 1 -i wg0 -o ens3 -j ACCEPT # Accept connections to WireGuard and HTTP/HTTPS ports PostUp = iptables -I INPUT 1 -i ens3 -p udp --dport 51820 -j ACCEPT PostUp = iptables -I INPUT 1 -i ens3 -p tcp --dport 80 -j ACCEPT PostUp = iptables -I INPUT 1 -i ens3 -p tcp --dport 443 -j ACCEPT # PostDown - Commands to run after stopping WireGuard PostDown = iptables -t nat -D POSTROUTING -s 10.0.0.0/24 -o ens3 -j MASQUERADE PostDown = iptables -D INPUT -i wg0 -j ACCEPT PostDown = iptables -D FORWARD -i ens3 -o wg0 -j ACCEPT PostDown = iptables -D FORWARD -i wg0 -o ens3 -j ACCEPT PostDown = iptables -D INPUT -i ens3 -p udp --dport 51820 -j ACCEPT PostDown = iptables -D INPUT -i ens3 -p tcp --dport 80 -j ACCEPT PostDown = iptables -D INPUT -i ens3 -p tcp --dport 443 -j ACCEPT # WireGuard port ListenPort = 51820 # Client configuration [Peer] PublicKey = $(cat /etc/wireguard/client_public_key) AllowedIPs = 10.0.0.2/32 EOF
- Create WireGuard client configuration file (copy and paste all the below lines together).
1
2
3
4
5
6
7
8
9
10
11
12
13

sudo cat > /opt/peer_wg0.conf <<EOF
[Interface]
PrivateKey = $(cat /etc/wireguard/client_private_key)
Address = 10.0.0.2/32

# Later, add PostUP and PostDown commands here

[Peer]
PublicKey = $(cat /etc/wireguard/server_public_key)
Endpoint = $(curl ifconfig.me):51820
AllowedIPs = 10.0.0.0/8
PersistentKeepalive = 25
EOF
- Enable IP forwarding and WireGuard service.
1
2
3
4
5
6

# Enable IP forwarding
sudo sed -i 's/#net.ipv4.ip_forward=1/net.ipv4.ip_forward=1/' /etc/sysctl.conf
sudo sysctl -p
# Enable WireGuard service
sudo systemctl enable [email protected]
sudo systemctl start [email protected]
- Reboot the server.
1

sudo reboot - Once the server is up, log back in and check the status of WireGuard. You should see your interface, key and port details.
1

sudo wg show
Setup Reverse Proxy using Caddy
Caddy is an extensible, cross-platform, open-source web server written in Go. Caddy has automatic TLS certificate provisioning using ACME protocol, and is enabled by default. This makes it perfect for a reverse proxy. Caddy can be installed natively as well as a container. Since we use DuckDNS, let us use a Caddy custom built docker image with DuckDNS module.
- On your remote server, install Docker (follow Step 1 from here).
- Create a directory for your Caddy configuration and compose files.
1
2
3
4

sudo mkdir /opt/caddy
# Make current user the owner of the directory
sudo chown $USER: /opt/caddy
cd /opt/caddy
- Create your Caddy compose file
compose.yamlin the directory you just created and add the below content. Make sure you update yourDUCKDNS_API_TOKEN.1 2 3 4 5 6 7 8 9 10 11 12 13 14 15
services: caddy: image: serfriz/caddy-duckdns:latest restart: always ports: - "443:443" - "80:80" environment: - DUCKDNS_API_TOKEN=<your duckdns token> volumes: - ./Caddyfile:/etc/caddy/Caddyfile - ./site:/srv - ./caddy_data:/data - ./caddy_config:/config - ./var:/var
- Create your Caddy configuration file
Caddyfilein the same directory with below content. Make sure you update your DuckDNS subdomain.1 2 3 4 5 6 7 8 9 10 11 12 13 14 15 16 17 18 19
nextcloud.myhosted.duckdns.org { # Reverse proxy to your local server, 10.0.0.2 is the WireGuard interface IP for your local server reverse_proxy http://10.0.0.2:8080 tls { dns duckdns {env.DUCKDNS_API_TOKEN} } log { output file /var/log/nextcloud-caddy.log { roll_size 1gb roll_keep 5 roll_keep_for 720h } } # A custom error message when the backend Nextcloud instance is down handle_errors { @maintenance expression {http.error.status_code} == 502 respond @maintenance "Sorry, the service is down right now. Please check back later." 502 } } - Spin up your Caddy container.
1
2
3
4

# Run the below command from the directory which contains the compose.yaml and Caddyfile.
docker compose up -d
# To view the container logs
docker compose logs --follow
- Open a browser and go to
https://nextcloud.myhosted.duckdns.org, the page should give you a custom error message saying “Sorry, the service is down right now. Please check back later.”. This is expected as we have specified this in the Caddyfile.
Configure the WireGuard Tunnel at Local Server for Port-Forwarding
- On your local server, where you have Nextcloud running, install WireGuard.
1
2
3

# Install Wireguard
sudo apt update
sudo apt install wireguard resolvconf -y
- Copy the
peer_wg0.conffrom your WireGuard server. This file will already have the correct keys and endpoint details.1 2
scp -i your_ssh_private.key ubuntu@<public IP of your remote server>:/opt/peer_wg0.conf . sudo mv peer_wg0.conf /etc/wireguard/wg0.conf
- Modify your
/etc/wireguard/wg0.confto add the PostUP and PostDown commands for port-forwarding. Add below lines between the[Interface]and[Peer]section. Make sure you updateeth0with your default network interface and<nextcloud server IP>with your local server IP.1 2 3 4 5 6 7
# PostUp PostUp = iptables -t nat -A POSTROUTING -o eth0 -j MASQUERADE # Nexcloud port-forward PostUP = iptables -t nat -A PREROUTING -p tcp -i wg0 --dport 8080 -j DNAT --to <nextcloud server IP>:8080 # PostDown PostDown = iptables -t nat -D PREROUTING -s tcp -i wg0 --dport 8080 -j DNAT --to <nextcloud server IP>:8080 PostDown = iptables -t nat -D POSTROUTING -o eth0 -j MASQUERADE
- Enable IP forwarding and WireGuard service.
1
2
3
4
5
6

# Enable IP forwarding
sudo sed -i 's/#net.ipv4.ip_forward=1/net.ipv4.ip_forward=1/' /etc/sysctl.conf
sudo sysctl -p
# Enable WireGuard service
sudo systemctl enable [email protected]
sudo systemctl start [email protected]
- Reboot the server.
1

sudo reboot - Once the server is up, log back in and check the status of WireGuard. If the tunnel is successful, apart from the local interface you should now see your remote WireGuard server as a peer and some traffic information. Similar result is shown by the WireGuard server as well when running the same command.
1
2
3
4
5
6
7
8
9
10
11
12

sudo wg show
# Expected output on local server:
# interface: wg0
#   public key: <client public key>
#   private key: (hidden)
#   listening port: 51820
#
# peer: <server public key>
#   endpoint: <public IP of the server>:1927
#   allowed ips: 10.0.0.2/32
#   latest handshake: 1 minute, 40 seconds ago
#   transfer: 62.85 MiB received, 10.88 MiB sent
- Open a browser and go to
https://nextcloud.myhosted.duckdns.org, you should now see your Nextcloud login page.
Congratulations on self-hosting Nextcloud and exposing it to internet! Check out this awesome list of self hosted services for inspiration on what to host next.
Thank you for reading, please share your feedback in the comments. Peace. ✌️