How to Build and Self-Host a Static Website
This blog is (mostly) self-hosted at my home on an old Asus Chromebox running as a container in my local Kubernetes cluster. That being said, running a static website at home doesn’t require any fancy hardware, containers, or Kubernetes. You can run this off a tiny Raspberry Pi Zero, an old laptop, or even an old smartphone. If you don’t want to self-host, there are lots of hosting services like Github pages, Netlify, Heroku etc., where you can run your static site for free! However, in this guide, we dive a little deeper into self-hosting and explore various ways we can run a website at home. If you feel this is total overkill, you are probably right! 😉
What is a static-website?
A static website is a type of website that displays fixed content to users. In contrast to dynamic websites, which generate content on the fly, static websites have pre-built content that remains the same for every user. The content is typically coded in HTML and may include stylesheets and JavaScript for presentation and interactivity. Static websites are great for blogs, resumes, portfolios or similar sites which don’t need complex interactive features, backend databases, user logins etc.
If you are not a front-end developer, it might be difficult to code, maintain and update static websites on your own. Static Site Generators (SSGs) are tools that automate the process of creating static websites. They take source files, often written in Markdown or a similar markup language, along with templates and other assets and generate a complete set of static HTML, CSS and JavaScript files.
Some of the popular SSGs include Jekyll, Hugo, Gatsby and Eleventy. We will use Jekyll for this guide since this blog was made using Jekyll with Chirpy theme.
Prerequisites for this guide
- Ownership of a domain. Although it is possible to use a free subdomain using services like DuckDNS, having a custom domain allows you to create a unique and memorable identity for your website.
- A Linux machine for building your site and hosting it. Preferably debian based, like Ubuntu Server 22.04.3 LTS
- Basic understanding of Linux and Networking.
Building the Static Site
Jekyll has a pretty good step-by-step tutorial on how to build a basic website, however if you are looking for a stylized site with a minimal theme you are better off using any of the open source Jekyll themes from jekyllthemes.org. A typical Jekyll theme project directory structure includes:
- _config.yaml: This YAML file contains configuration settings for the Jekyll site, including site metadata, settings for plugins and other global configurations.
- _includes: This directory contains snippets of reusable code that can be included in layouts and posts using Liquid tags. This helps in modularizing the code.
- _layouts: This directory holds the templates for different layouts used across the site. Layouts define the overall structure of pages and content can be injected into these layouts.
- _posts: This directory is used to store blog posts. Posts are written in Markdown or HTML and follow a specific naming convention (YYYY-MM-DD-title.md) to determine the publication date.
- _data: Since Jekyll doesn’t use a database, this folder can contain files (YAML, JSON, CSV or TSV) with structured data that can be used in the site. Data files can be accessed within templates to populate content dynamically.
- index.md (or index.html): The main entry point of the site, where the homepage content is defined. The index.md file is automatically used as the homepage unless configured otherwise.
You can read more about the Jekyll directory structure in the official documentation.
Most of the themes you see at jekyllthemes.org would have the above directory structure.
- On your Linux machine, install Jekyll.
1
2
3
4
5
6
7
8
9

# Prerequisites
sudo apt install ruby-full build-essential zlib1g-dev
# Setup gems path
echo '# Install Ruby Gems to ~/gems' >> ~/.bashrc
echo 'export GEM_HOME="$HOME/gems"' >> ~/.bashrc
echo 'export PATH="$HOME/gems/bin:$PATH"' >> ~/.bashrc
source ~/.bashrc
# Install Jekyll and Bundler
gem install jekyll bundler
- Clone the theme project to your linux machine, we use Chirpy theme for this guide:
1 2
git clone https://github.com/cotes2020/jekyll-theme-chirpy.git cd jekyll-theme-chirpy - Update the
_config.ymlfile with your site details. - If you have chosen a blog theme, add a post in the
_postsdirectory. - If you have custom images, icons or stylesheets, update the
assetsdirectory. - Additionally, read the theme documentation and update any other files as necessary.
- Once you are done, it is time to install the dependencies and build the site. Run below commands from the root directory of your site.
1
2
3
4

# Install dependencies.
bundle install
# Build and serve the site
bundle exec jekyll serve --host 0.0.0.0 --port 9000 --incremental
- Your site files will be generated in the _site directory and you can browse it at
http://localhost:9000. - If required, you can now make modifications to your site and view the preview in your browser.
- Once you are done editing your site , you can run below command to create a final build in the
_sitedirectory.1
JEKYLL_ENV=production bundle exec jekyll build
Serving the Static Site using a Web Server
A web server is software that serves as the foundation for delivering web content over the network. It handles incoming requests from clients (such as web browsers), processes these requests and sends back the appropriate responses, typically in the form of HTML pages, images or other resources. Web servers generally use HTTP protocol to facilitate communication between clients and servers. Examples of web servers include Apache, Nginx, Microsoft Internet Information Services (IIS) etc.
Since we are serving a static website, we just need a light-weight performance oriented web server and Nginx is one of the best and battle-tested choice. Let us install Nginx on a machine which you want to use as your server.
The installation steps differ based on your operating system, for this guide we use Ubuntu Server 22.04.3 LTS. Please refer the Nginx documentation for other operating systems.
- Install Nginx.
1
2
3

sudo apt update
sudo apt install nginx
sudo systemctl start nginx
- Your Nginx web server should be now running at
http://localhostand should give you a default welcome page. - Copy your static site contents from
_sitedirectory to/usr/share/nginx/html/, replacing the existing files in the destination directory. Your/usr/share/nginx/html/directory should now look like:1 2 3 4 5 6 7 8 9 10 11 12 13 14 15 16 17
/usr/share/nginx/html ├── 404.html ├── about ├── app.js ├── archives ├── assets ├── categories ├── feed.xml ├── index.html ├── norobots ├── posts ├── redirects.json ├── robots.txt ├── sitemap.xml ├── sw.js ├── tags └── unregister.js
- Nginx will now serve your static site at
http://localhost.
Exposing the Static Site to Internet
Once your website is production ready, it is time to publish it to the internet. The easiest way to do this is by doing a port-forward of your web server port and then accessing your website via your public IP or a domain mapped to your public IP. However, if you are planning to self-host at home, it is not a good idea to expose your home server to the internet as it can increase the risk of security vulnerabilities and potential attacks, unless you have good security infrastructure. Additionally, some ISPs use CGNAT and port-forwarding might not even work on such networks. Let us look at some of the other options:
- Creating a Cloudflare Tunnel to your web-server and allowing Cloudflare to act as a reverse-proxy.
- Creating a simple SSH reverse tunnel to a remote cloud instance which acts as a reverse-proxy.
- Creating a self managed WireGuard VPN tunnel to a remote cloud instance which acts as a reverse-proxy. Interested? Check this out.
- Using AWS or other public cloud platforms to act as a front-end or Web Application Firewall.
For this guide, we use Cloudflare Tunnels due to its simplicity and ease of use. Cloudflare is an industry leader in Content Delivery Network, DDoS Protection and Website Performance Optimization. Cloudflare Tunnels allows you to create a free tunnel to expose your websites via Cloudflare’s proxy which hides your public IP, provides free SSL certificate, enables DDoS protection, caching, Firewall, Email routing and much more! However, please keep in mind that Clouflare can technically inspect your traffic even if you use SSL/TLS as they intercept SSL communication using their own certificate. Since we are hosting a static website, it shouldn’t matter to us since there is no user login or data transfer to the server. Let us get stared with Cloudflare Tunnel.
- Sign up for a Cloudflare account.
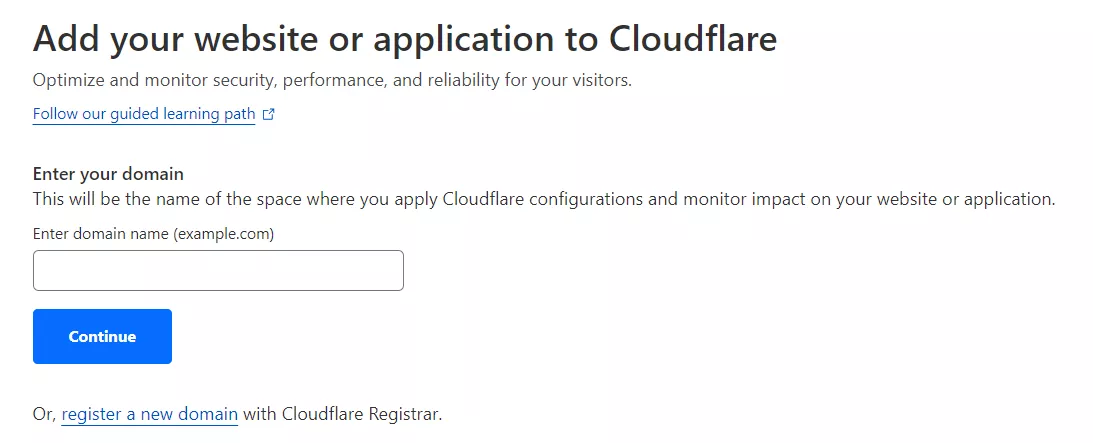
- From your Cloudflare Dashboard, select Websites → Add a site → and enter your domain name:
- Select the free plan and click on next.
- If your domain is registered via Cloudflare, you don’t have to update your nameservers, otherwise update your nameservers as shown by Cloudflare. You might need to check your registrar’s documentation for this. More info here.
- Once your nameservers are updated, the sites should show as active in Cloudflare dashboard.
- Install
cloudflaredon your web server.1 2 3 4 5 6 7 8
# Add cloudflare gpg key sudo mkdir -p --mode=0755 /usr/share/keyrings curl -fsSL https://pkg.cloudflare.com/cloudflare-main.gpg | sudo tee /usr/share/keyrings/cloudflare-main.gpg >/dev/null # Add this repo to your apt repositories echo 'deb [signed-by=/usr/share/keyrings/cloudflare-main.gpg] https://pkg.cloudflare.com/cloudflared jammy main' | sudo tee /etc/apt/sources.list.d/cloudflared.list # install cloudflared sudo apt update sudo apt install cloudflared
- Create the tunnel.
1
2
3
4
5
6
7
8

# Switch to root
sudo su -
# Login to Cloudflare
# This should open a browser, login with your username and password, and select the site which you just added.
cloudflared tunnel login
# Create tunnel
cloudflared tunnel create <Tunnel-Name>
# Note your tunnel UUID
- Create a configuration file
config.yamlin your$HOME/.cloudflareddirectory with below content (update paths and UUID):1 2 3
url: http://localhost:80 tunnel: <Tunnel-UUID> credentials-file: /root/.cloudflared/<Tunnel-UUID>.json
- Start routing traffic.
1

cloudflared tunnel route dns <Tunnel-Name> <Domain-Name>
- Install cloudflared as a service.
1 2 3
cloudflared service install systemctl start cloudflared systemctl status cloudflared - If the configuration is correct, your static site should be now exposed to the internet via your domain name.
To troubleshoot your tunnel, check the logs using the command journalctl -u cloudflared.service for any issues.
That will be it for this guide. Congratulations on self-hosting your static website! 🚀
Stay tuned for similar guides. Thank you!